

Discover the Tools and Techniques You'll Need to Level Up Your Latte Art Game
Are you a coffee lover who's tired of staring at the same old boring cup of joe? Well, have no fear, latte art is here! Not only does it taste delicious, but now your morning caffeine fix can also be a work of art.
Think of it as coffee meets Picasso, but instead of paint and canvas, it's all about steamed milk and espresso. And let me tell you, these baristas take their craft seriously. They're like wizards with a milk pitcher, conjuring up designs that will make your heart skip a beat (or at least make your Instagram followers jealous).
But don't be fooled, latte art is no easy feat. It takes practice, patience, and a steady hand. It's like trying to paint a Mona Lisa with a toothpick - not exactly a walk in the park. But fear not, my coffee-loving friend, with a little bit of guidance, you too can become a latte art master.
And if you're thinking, "I can barely draw a stick figure, how am I supposed to create latte art?" Well, that's where we come in. We're here to guide you through the world of milk pitchers and espresso shots, and help you create a masterpiece that will make even the most skilled barista jealous.
So let's dive into the factors to consider when choosing the ultimate milk pitcher for your latte art dreams. And trust us, it's not just any old container for milk. It's an extension of your barista hand, and an essential tool for creating those Instagram-worthy designs.
Explore our range of professional milk pitchers and frothing jugs.
Latte Art: The Picasso of Coffee
Latte art is like the Picasso of coffee - it's all about creating beautiful designs and patterns on the surface of a latte or cappuccino. But instead of paint and canvas, baristas use steamed milk and espresso to create their masterpieces. And let me tell you, these artists take their craft seriously.
A Blend of Artistry and Coffee-Making Prowess
To create latte art, a barista steams milk until it's smooth and creamy, like a heavenly cloud. Then, they pour the milk into the espresso in a way that creates a beautiful design. Some common designs include hearts, rosettas, and tulips, but these baristas can create just about anything you can imagine (like a dragon breathing fire on your latte - okay, maybe not that).
But latte art isn't just about making coffee look pretty. It's also a way for baristas to show off their skills and impress customers with their coffee-making prowess. And let's be honest, who doesn't love a little bit of showmanship with their morning caffeine fix?
So the next time you order a latte or cappuccino, take a moment to appreciate the beautiful artwork on top. And if you're feeling really adventurous, ask your barista to create a custom design just for you. Who knows, you might just end up with a latte art masterpiece that's almost too pretty to drink (but let's be real, you're definitely going to drink it).
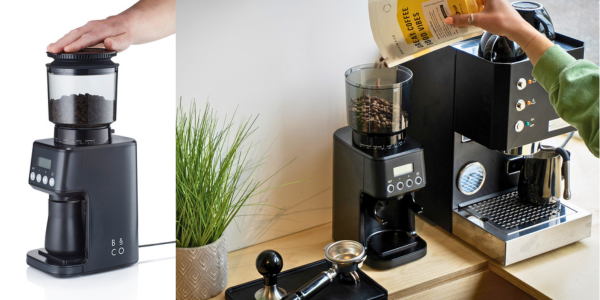
Choosing the Ultimate Milk Pitcher for Your Latte Art Dreams
If you're serious about crafting the perfect latte art, then you better make sure you choose the right milk pitcher. It's not just any old container for milk, my friends. It's an extension of your barista hand, and an essential tool for creating those Instagram-worthy designs. So, let's dive into the factors to consider when choosing the ultimate milk pitcher for your latte art dreams.
Factors to Consider When Choosing the Perfect Milk Pitcher
First things first, size matters, folks. If you're making single shots, a 12-ounce pitcher is perfecto. Double shots? You'll need a 20-ounce pitcher to get the job done right. And if you're feeling extra fancy and making larger drinks, then go for a 32-ounce pitcher, baby!
Next up, let's talk shape. The shape of your pitcher is key for creating those intricate designs. A pointed spout will give you more control and precision when pouring, while a rounder pitcher may be more forgiving for beginners. It's all about finding the right balance for you.
When it comes to material, stainless steel is the go-to for durability, ease of cleaning, and heat retention. But hey, if you want to add a little flair to your setup, go for a ceramic or glass pitcher for the aesthetic appeal.
Comfort is key, my friends. Look for a handle that is heat-resistant and comfortable to hold. And let's not forget about the weight of the pitcher. A heavier pitcher may be more stable, but a lighter one may be easier to handle. It's all about finding that Goldilocks level of comfort.
Now, onto brand and price. Look for a reputable brand that's known for producing high-quality products. And don't worry about breaking the bank - you don't have to spend a fortune to get a great pitcher. Find one that meets your needs and fits your budget.
Don't forget about the spout size and shape - it can make a huge difference in your latte art game. A narrow spout will give you more control and precision, while a wider spout may be easier to pour from. And some pitchers have a curved spout, which can help you create even more intricate designs.
Durability and ease of cleaning are important too. You want a pitcher that can handle the wear and tear of daily use and is easy to clean with no annoying crevices.
Make sure your pitcher is compatible with your espresso machine. Some machines have different sized steam Latte art isn't just a way to impress your customers - it's also a way to show off your coffee-making skills and create something beautiful. But let's be real, latte art is hard. It takes practice, patience, and a steady hand. But fear not, my coffee-loving friend, with a little bit of guidance, you too can become a latte art master.
Crafting the Perfect Latte Art: Tips and Techniques
Step 1: Steam your milk like a pro
The first step to perfecting latte art is steaming your milk like a pro. This means creating the perfect texture of microfoam. To do this, start by placing the steam wand just below the surface of the milk and turning it on full blast. Once the milk starts to spin, lower the wand a little bit and continue to steam until the milk reaches the desired temperature. The key is to create a smooth and creamy texture, without any large bubbles.
Step 2: Pour like you mean it
Once you've steamed your milk to perfection, it's time to pour like a pro. Start by pouring a small amount of milk into the center of the espresso. Then, raise the pitcher a little bit and pour in a circular motion to create the base of your design. From there, you can get creative and create different designs like hearts, tulips, or even a cute little bear.
Step 3: Practice, practice, practice
Perfecting latte art takes practice, so don't get discouraged if your designs don't turn out the way you want them to at first. Keep practicing your steaming and pouring technique, and don't be afraid to experiment with different designs.
Pro tip: Invest in a good milk pitcher
Having the right tools can make all the difference when it comes to latte art. Invest in a good milk pitcher with a pointed spout, which will give you more control when pouring the milk. Plus, a fancy milk pitcher makes you feel like a pro, and that's half the battle.
Types of Milk
First things first, let's talk about the different types of milk. There's cow's milk, almond milk, oat milk, soy milk, and even camel milk (yes, you read that right). But which one is the best for frothing? Let's break it down.
Cow's Milk: The Classic Choice
Ah, good ol' cow's milk. It's the classic choice for frothing, and for good reason. Cow's milk has the perfect balance of fat and protein, which makes it easy to froth and creates a creamy, velvety texture. Plus, it's widely available and affordable. So if you're a traditionalist, cow's milk is the way to go.
Almond Milk: The Hipster Choice
Are you a hipster who loves almond milk in everything? Well, you're in luck! Almond milk is a great alternative to cow's milk and is perfect for those who are lactose intolerant. However, it's important to note that almond milk doesn't have the same fat and protein content as cow's milk, which can make it a bit trickier to froth. So if you're using almond milk, make sure it's the barista blend variety, which has a higher fat content and is specifically designed for frothing.
Oat Milk: The Trendy Choice
Move over almond milk, there's a new trendy milk in town. Oat milk has exploded in popularity in recent years, and for good reason. It's creamy, slightly sweet, and perfect for frothing. Oat milk has a similar fat and protein content to cow's milk, which makes it a great alternative for those who are lactose intolerant or vegan. Plus, it's a sustainable choice, as oats require less water and land to grow compared to other crops.
Soy Milk: The Controversial Choice
Soy milk is a bit of a controversial choice in the frothing world. Some swear by it, while others say it's too thin and doesn't froth well. Soy milk has a similar fat and protein content to cow's milk, but some say it has a slightly nutty flavor that can affect the taste of your coffee. So if you're a die-hard soy milk fan, go for it. But if you're new to the frothing game, you may want to stick with cow's milk or one of the other alternatives.
Camel Milk: The Wildcard Choice
Okay, hear us out on this one. Camel milk may seem like a bizarre choice for frothing, but it's actually been used for centuries in parts of the world like the Middle East and Africa. Camel milk has a similar fat and protein content to cow's milk, and some say it has a slightly sweet and nutty flavor. However, it's not widely available in most parts of the world, so unless you have a camel farm in your backyard, you may want to stick with one of the other choices.
In conclusion, the best milk for frothing depends on your personal taste and dietary preferences. While dairy milk is the classic choice and provides the creamiest and most velvety texture, there are also plenty of plant-based options that can produce a great froth. Whether you choose to go with oat milk, almond milk, soy milk, or any other alternative milk, make sure to experiment with different brands and types to find the one that works best for you. And remember, no matter what milk you use, always have fun with it and don't take your coffee too seriously.
So there you have it, my fellow coffee lovers - the key to perfecting latte art. Remember, practice makes perfect, and don't be afraid to get creative with your designs. And above all, have fun with it! After all, latte art is just coffee with a fancy hat on top.


Leave a comment